Archive for the ‘Life’ Category
Creamy Asparagus Soup and Roasted Veggies – A healthy dinner, topped with bacon and followed with a sugar rush for dessert!
April 14th, 2009 Posted 1:44 pm
Last week we had HUGE asparagus stalks in our CSA box. I have never seen asparagus quite so massive. With the chilly weather and a lack of creativity, I stole this recipe from Maeve for Asparagus soup and switched it up a bit to make a pretty quick weeknight dinner that lasted through two rounds of leftovers. We had soup again on Sunday with our potato cakes leftover from the Passover/Easter dinner, and AGAIN on Monday with some egg salad sandwiches. Yum!! It’s finally gone now, but it was definitely worth the minor effort I put into it 🙂
Maeve is amazing and made an asparagus based stock for her soup….I used veggie broth from a box. It was the middle of the week. Just deal with it :) I also had a different set of vegetables on hand, and didn’t feel like going to the store, so the variety in the soup got switched up a bit as well. This is where the stalks of our Red Swiss Chard (previously noted in the side-dish yuckiness from this past weekend) came into play. I also bacon-ed it up a bit because we had some bacon in the fridge that needed to be used up quickly. This made the original dish AMAZING, but we had it without bacon both times we had leftovers and it was still mucho delicious.
- 1 Box Vegetable Stock
- 2 Tb Olive Oil
- 1 onion, chopped
- 1 Bunch asparagus, tops reserved (we also had some leftover stalks frozen from our yummy asparagus side dish that we served with pan fried scallops a while ago)
- 2 small potatoes, diced
- 2 cloves crush garlic
- Stalks from 1 bunch of red swiss chard, chopped small
- Salt & Pepper
- 1/4 cup milk
- Bacon!
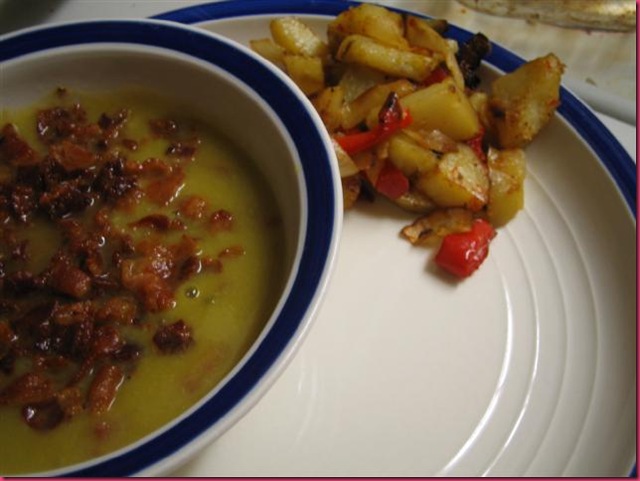
Heat olive oil in large stockpot. Sauté middle portions of asparagus stalks, chopped onion, potatoes, and garlic until a little brown. Add stock to cover and simmer until the veggies are nice and soft. Puree (I used our wonderful stick blender!). Turn it on low heat and add Simmer for 20 minutes covered until vegetables can be mashed with the back of a spoon. Puree soup until smooth. Return to a very low heat and add milk, asparagus tops, and chopped chard stalks. Cook on low until the veggies are cooked through (the chard will take a little longer than the asparagus, so you may want to add the asparagus a few minutes after the chard). While this was happening, we had chopped the bacon and then cooked slowly over medium-low heat to render out as much fat as possible, then cranked the heat to get it nice and crispy. This went on top of the soup! Yum!
We also roasted some potatoes, red peppers, onions and garlic coated in olive oil to serve alongside. When we were cleaning up after dinner, we threw the handful of leftover roasted veggies into the soup and it became a creamy asparagus vegetable soup for the rest of its yummy career.
Thanks for the inspiration Maeve!!
Matt made dessert! We had a package of strawberries from our CSA and he grabbed some angel food cake and whipped cream at the store. This was a complete sugar overload and so huge I couldn’t finish, but a satisfyingly sweet to end the evening.
Matzah Brie, Passover/Easter dinner, and Dying Eggs!
April 13th, 2009 Posted 9:08 pm
Happy Passover/Easter/Earth Day/Any other reason to celebrate! Yay!
My big editing job is D-O-N-E DONE! HOORAY! I have a couple tiny things to finish up with it, but the deadline was Sunday night, and I felt like I was back in grad school working on that all weekend. But now it’s finished and I feel GREAT! Tonight has been ridiculously relaxing after a hectic day at work, and I had no idea how restful it would be to come home and not have editing work to do! I spent the night making egg salad for dinner, finishing up my nut butter cups for the blogger bake sale high bidder and doing other little chores, but to not have the huge editing project hanging over my head was amazing!
I have a few things I want to post, since I’ve been a bit behind in updating and keeping on top of some of the fun recipes we’ve been trying. But to celebrate the holiday weekend, you get our Passover/Easter weekend food!
I splurged and bought lamb from Whole Foods for our Saturday night dinner because Matt and I are huge lamb fans and we don’t usually spend extra money on meat for cooking at home (I dream of a day when I can buy half a cow from a farmer and have a huge freezer to store it all away).
We had also gotten a bunch of Red Swiss Chard in our CSA box last week and have been trying to think of ways to use it. I’m usually wary of greens…I have never been a big fan of collard greens or other dark greens when they’re just sautéed or served on their own as a side dish. But, some things I read online about it made me think maybe I wanted to revisit greens.
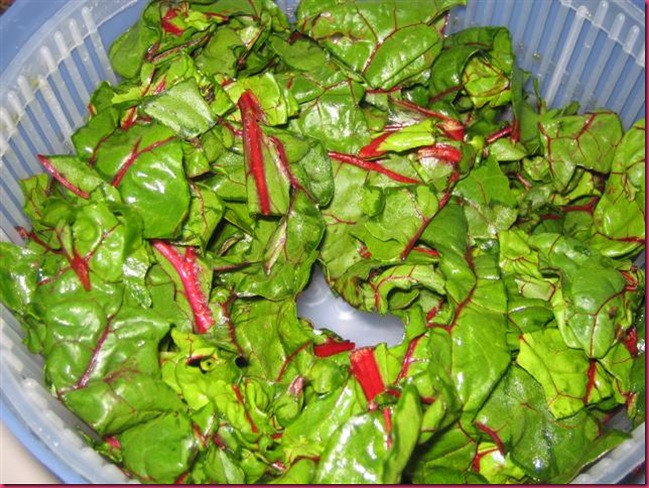
Earlier in the week, we had used the stems from the chard in a soup (recipe to come!), so we washed and chopped the leaves, which are absolutely gorgeous. I love the bright vibrant colors that you can find in fruits and vegetables.
I decided to jump right into the experiment and just sauté the chopped chard with some olive oil and garlic…..I was skeptical the whole time.
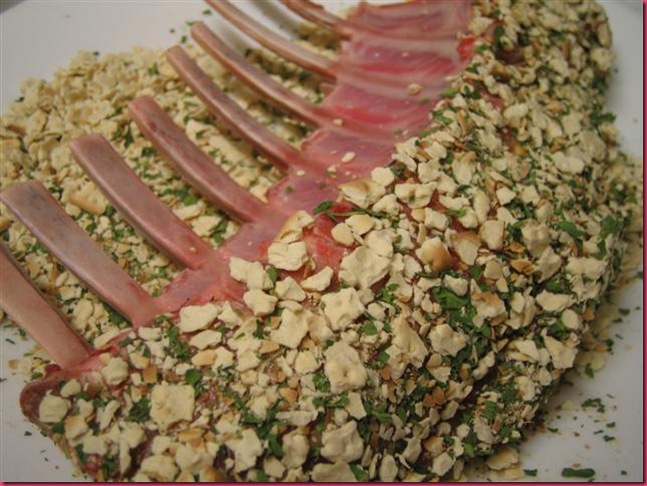
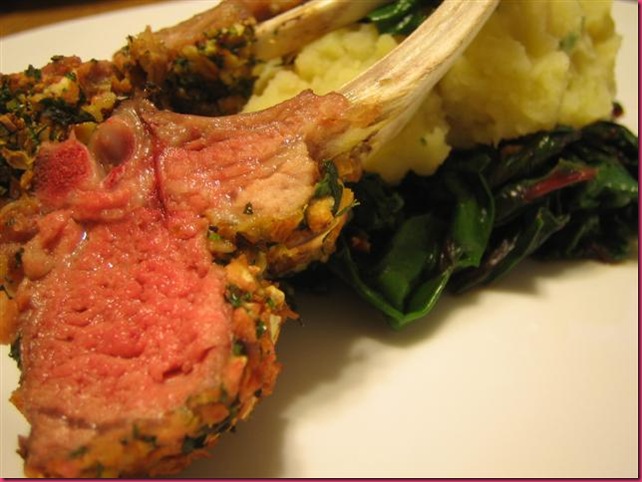
For the lamb, we trimmed off some fat, crushed a couple pieces of matzah, mixed it with some parsley, and coated the lamb.
We pan fried this for a couple minutes on each side and then threw it in a 400 degree oven until it reached 145 degrees internally (medium rare-ish). After we pulled it out, we covered it and let it rest while I finished up the greens and our other side dish.
We served the meat with the sautéed chard and some mashed potatoes (made with some seasoned chicken broth, salt, pepper, and parsley…no dairy!). The leftover potatoes were made into potato cakes the next night to go with the leftover soup from the earlier meal mentioned above! Leftovers all around!!
The lamb was a little less done than we had planned, but amazing anyway. Lamb is one of the few meats I can eat when it is this pink. YUM. The potatoes were super flavorful and went really well with the meat. Matt liked the chard and cleaned his plate, but I couldn’t do it…the flavor wasn’t there for me, but I think it really comes down to the texture and temperature of greens cooked like this. They’re too slimy and soft for me, plus they never seem to be hot…the chard was the last thing to come off the stove for this meal, and yet when I sat down to eat it was already cold…cold and slimy? Not my thing. But the rest of dinner was so good! And look how pretty it is!
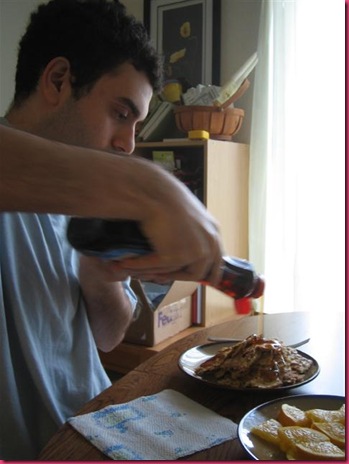
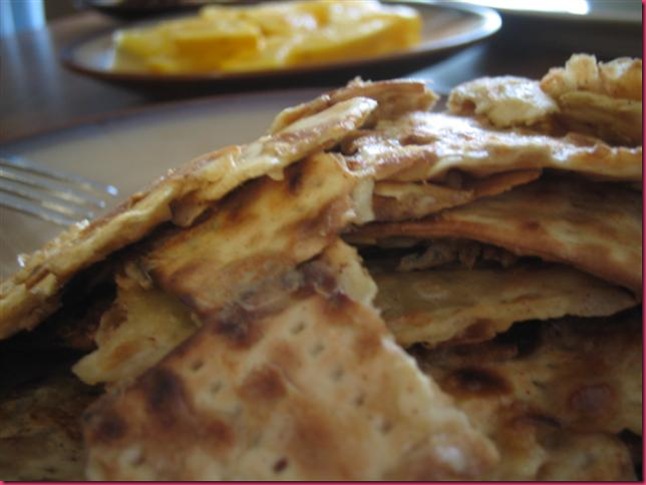
Sunday morning we made one of Matt’s favorites…matzah brie!! (Pronounced “BRY†not “BREEâ€â€¦there is no yummy gooey cheese involved in this dish, sad to say). It’s basically french toast made with matzah. We added lots of cinnamon and dipped it in syrup! Mmmm! We also tried to be somewhat healthy and share an orange, but the orange we had was flavorless and just tasted like slightly orange-flavored water. Blech.
In the afternoon, I took another quick break from editing to teach Matt some fun things about Easter (I had no time to make Easter baskets for us this year 🙁 booo.) Matt is horribly disgusted by the smell of vinegar, so we used lemon juice instead…vinegar would have made brighter colors, but no one was gagging at least! The green, blue, yellow, and orange were decently bright, but the pink was super disappointing! I was looking forward to some bright bright pink eggs! The swirly green one is my favorite! 🙂
I look like a monster attacking the camera with my huge hands in this picture, but I had to post it because you can see Santana popping her head up in the background! She wanted to help SO badly!
I hope everyone had a wonderful Easter and Passover! More recipes and yumminess to come soon!
Guest Post on Dori’s Shiny Blog
April 9th, 2009 Posted 11:17 am
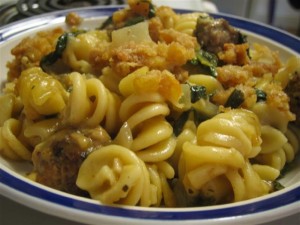
Click over to Dori’s blog to read my guest post about my Italian Wedding Casserole! Lots of pictures and the Sage Parmesan Meatball recipe! This is a really fun meal that Matt and I made together and has lasted through several rounds of leftovers…yum yum yum! Here are the instructions for putting the casserole together (you’ll have to head over to DSB to get the meatball recipe!):
- What You Need:
• Pasta (We used Rotelle, but any curly or spiral pasta will work)
• About 1/3 of the sage parmesan meatball mix
• Chicken stock
• 1 Tb Flour
• 1 Tb olive oil
• 1 Tb Minced garlic
• 1 Diced onion
• 1 bunch fresh spinach, washed, drained, and chopped. (Or frozen spinach, defrosted, drained, squeezed as dry as possible)
• Ritz crackers
• Butter
• Parmesan Cheese
• Salt and Pepper
• Basil, parsley, sage, cayenne pepper
Â
- What You Do:
• Cook pasta, as directed on package, drain, and set aside.
• While pasta cooks, mix your meatballs and pan fry.
• Remove with a slotted spoon and drain on paper towels — if there is a ton of grease in the pan, pour off or soak up (with a paper towel) most of it, leaving about 1/2 a teaspoon
• Sprinkle flour around pan, stirring to coat with grease in the pan and let it cook for a couple minutes on medium heat (this will take away some of the floury taste)
• Add salt, black and cayenne pepper, basil, parsley and sage and slowly add stock, stirring constantly and mixing completely with the flour after each bit is added.
• When all the stock has been added to the pan, keep stirring so it doesn’t burn or stick. Bring it to a simmer and let it cook for 5 minutes. This will get it just a little bit thick.
• While sauce is cooking, heat olive oil in pan over medium-high heat.
• Sauté onion and garlic in pan until very soft and translucent (caramelized a bit if you want that extra sweetness).
Add spinach to pan and stir. As the spinach cooks it will wilt down quite a bit. It might seem like you have a TON of fresh spinach, but it will result in a lot less cooked than you think.
• Cook until spinach is wilted and tender, stirring constantly. Set aside.
• In a large bowl, mix pasta, meatballs, spinach, stock mixture and a handful of parmesan cheese until well blended.
• Pour into large, greased casserole dish.
• In small saucepan, melt 1 stick of butter. Crush 1 tube of Ritz crackers (you can really use any kind of crackers you want, but Ritz are super buttery and have the best taste as far as I’ve found so far)and add to the melted butter (along with a small handful of parmesan cheese), stirring to coat.*
• Top the casserole with the deliciously buttery cracker mix.
• Bake this in 350 degree oven for 20-30 minutes or until bubbly and hot in the middle. The time will vary based on what size/shape casserole dish you use. You’ll want to watch the crackers, because they could burn if the oven is too hot or they’re in there too long…if you see them starting to get too dark, just cover with aluminum foil. Since everything is already cooked, you’re really just aiming for it to be heated and bubbly all the way through and for the cracker topping to get nice and brown!Â
*It should be noted that the topping on this casserole comes originally from a broccoli cheese casserole side dish I learned from my greasy friend from KY, Bob…while we were Undergrads, we spent a LOT of time topping things with butter and crackers. It’s delicious.
Thanks to Dori for letting me guest post! 4th bar review later today after my afternoon snack! (The last of the leftover italian wedding casserole for lunch today, so that will probably hold me over for a while!)
Posted in Fun, interwebs, Life, Matthew, Southern Love, super-friends, Yum
Apple Bread & Bar Review 3/5
April 8th, 2009 Posted 6:14 pm
|
Today’s Bar: White Chocolate Macadamia Luna Bar (also by Clif Bar) |
| Package Goodies: High in Calcium, Folic Acid, AND Antioxidants. 70% Organic, Entirely Natural (again, this means nothing…in some cases, things that are allowed by the FDA to be listed as “Natural Flavor†are more toxic than some “Artificial Flavorâ€). 6g Fiber, 3g Protein, Low Glycemic.
Ingredient List: LunaPro (Soy Rice Crisp [Soy Protein Isolate, Organic Rice Flour], Organic Toasted Oats, Organic Roasted Soybeans, Organic Soy Flour, Organic Flaxmeal), Organic Brown Rice Syrup, Organic Coating (Organic Evaporated Cane Juice, Organic Palm Kernel Oil, Organic Soy Flour, Organic Soy Lecithin, Organic Vanilla), Organic Macadamia Nuts, Inulin (Chicory Extract), Organic Macadamia Nut Butter, Vegetable Glycerin, Organic Oat Syrup Solids, Organic Sunflower Oil, Sea Salt, Natural Flavors. Very similar list of ingredients as yesterday’s bar. Chock full of nutrients and good-for-you stuff.
The Verdict: Was this actually nutritious? Because it tasted like dessert! White Chocolate Macadamia Nut Cookies are one of my favorites, so I knew I had to try this flavor bar. So delicious! I really liked the texture of the puffed rice type bar, with the layer of white chocolate on the bottom (and swirled across the top!). Sometimes I need a more fruity snack, but this is perfect for that chocolate/sweet craving I get some days. I had a Luna Bar with Matt the other day at the gym…I think it was something with peanut butter. It was equally as satisfying. I can see why these are getting such rave reviews across the blogs! I will definitely be stocking up on these anytime I see them on sale!! I have noticed with both yesterday’s Clif Energy Bar and this Luna Bar, that I am completely a sucker for nice packaging. Pretty colors, interesting designs, feel-good statements about the product philosophy…this stuff absolutely works on me. (I think it’s interesting that the Clif Bar company has an entire bar spawned off of it devoted to natural energy for women…this seems a bit sketchy, but I’m still a sucker, so I’ll buy into it for now) I’m a marketing team’s dream. Does it affect whether I enjoy actually eating it?? I’m not sure…probably a little, but I also know that I’ve had bars in hideous packaging that I’ve loved, and bars in really cute, promising packaging that have been horrible. Either way, yum for Luna Bar! There are a bunch of flavors, so I can’t wait to try more! |
Even though I was really busy on Monday night, I managed to make some yummy apple bread for breakfast the next day! It’s from my Better Homes & Gardens cookbook, and it was super easy! We doubled this batch because we had a giant pile of apples leftover in the fridge that weren’t good enough for eating out of hand, but perfect for shredding into some bread!
Apple Bread
- 1.5 cups AP flour
- 1 tsp ground cinnamon
- 1/2 tsp baking soda
- 1/2 tsp salt
- 1/4 tsp baking powder
- 1/4 tsp ground nutmeg
- 1 beaten egg
- 1 cup sugar
- 1.5 cups finely shredded, peeled apple
- 1/4 cup cooking oil
- 1/2 cup chopped walnuts or pecans, toasted (I didn’t toast them because I was lazy…it was 100% fine)
- Grease your loaf pan (I used about 6 mini loaf pans for my double batch) and set aside. In a medium bowl, combine the flour, cinnamon, baking soda, salt, baking powder, and nutmeg. Make a well in center of flour mixture; set aside.
- In another medium bowl combine egg, sugar, apple, and oil. Add apple mixture all at once to flour mixture. Stir just until moistened (batter should be lumpy). Fold in nuts. Spoon batter into prepared pan.
- Bake at 350 degrees for 50-55 minutes (our oven is wonky and vacillates in temperature a lot, but all my mini-loaves baking at once took about this long to cook…I’d recommend checking on them at 30 minutes or so, just to make sure you don’t burn them!) or until a wooden toothpick inserted near center comes out clean. Cool in pan on a wire rack for 10 minutes. Remove from pan. Cool completely on a wire rack. Wrap and store overnight before slicing (HA! This did NOT happen.)
I’m really glad I took the time out of editing to make this. It was really easy and everyone here, at my work, and at Matt’s work loved it! Fruit breads like this (very similar to bananananana bread) are so easy because there is no special folding or sifting or straining or anything to do….mix the dry, mix the wet, throw ‘em together and you’re good to go! I grew up with Shed’s Spread Country Crock spread, and it is the PERFECT smooth flavor for this kind of bread, even though we go for regular butter most other times.
If you’re not a big baker, this is a good kind of baked good to start with (probably why I love it so much!). Now, back to editing!! Tomorrow, guest post on Dori’s blog!
Blogger Bake Sale Begins & Bar Review 1/5!
April 6th, 2009 Posted 9:09 am
Happy Monday! I think Tuesdays are the new “Mondays†for me…Mondays I am refreshed, full of mocha, and in a pretty great mood. Tuesdays, I am dragging and not so peppy.
So there is a lot going on this week. I’m still busy editing (hopefully only through next Sunday!), I’ll have a guest post on Dori’s blog later this week, we’re planning for my parents’ visit in a few weeks, Passover starts Thursday, we need to dye some Easter eggs, the Blogger Bake Sale starts today and we have lots going on with applications at work.
To keep up my posting all week, make sure I try some new delicious things and save me from coming up with a new post idea or meal all week, I’m doing a series of bar reviews! Turns out, the blogging world LOVES bars, breakfast cookies, mini snacks…really things that come in wrappers and taste delicious. Last week, on my way back into the office on afternoon, I stopped in the school bookstore and realized they have an entire wall filled with bars! All different brands, flavors, sizes, shapes, etc. So, I spent a decent chunk of money on a big pile of different bars…the person working there must have thought I was at least a little nuts. Plus, I got a staff discount! Discount bars are my favorite!! So, I have 5 bars to try this week and the plan is to share one each day.
|
Today’s Bar: Oskri Coconut Bar with Mango by Oskri Organics |
| Package Goodies: Gluten Free, Lactose Free, Vega, USDA Organic, and it has some symbol that I absolutely don’t recognize.
Ingredient List: Coconuts 50%, Rice Syrup, Mango Concentrate 1% Such a basic list of ingredients! The nutrition facts are not crazy wonderful for this, but it’s nice and simple, so at least I know that the calories and fat I’m getting from the bar aren’t coming from a ton of additives and other junk. The Verdict: This is pretty much what it says…Coconut. Shredded coconut packed together in a bar shape. There are little bits of mango throughout and a slightly orange tint to the coconut, but not a hug mango taste at all. At first, I thought it was a little too dry and plain flavored, but as I kept eating, the coconut was really nice (if you like coconut!) and not too sweet, which is definitely a plus. I actually nibbled on little bites of this one throughout the first hour or so of the day, because it was a little too much coconut for me to eat all at once. If I was in the right mood, I’d probably get this again…not necessarily for a breakfast bar, but more as a snack to last me through the morning or afternoon. I like things that I can consistently snack on for a long period of time…which is why chips or nuts or other bite size things are my downfall. “I’ll just have a few of these chocolate covered edamame†turns into “Hmm…how’d that entire container get empty??†|
Make sure you check out Meghann’s Blogger Bake Sale. It just started today and there are a TON of amazing-looking goodies on there to bid for (plus some customizable nut butter cups from me!). The proceeds go to a great cause, and you’ll end up with some really delicious treats!






 Â
 