
Archive for January, 2008
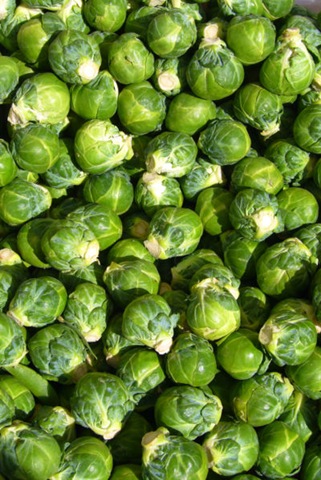
…even Brussels sprouts?
January 24th, 2008 Posted 12:07 am
So, mostly everyone I’ve talked to about this recipe eventually responds with something along the lines of, "yeah, well, cream and bacon will make anything delicious." Probably fairly true…I am a huge fan of bacon. I really align myself with Homer on this one…Simpson that is…the pig is indeed a "wonderful, magical animal."
That being said, I was really surprised at how wonderful this dish turned out. (I had this dish at a dinner party a little over a year ago, and this was my attempt to replicate it without a specific recipe)
Brussels sprouts are a type of cabbage, which I’m usually not a fan of unless it’s in a really well-made coleslaw. When we bought the pack of B.sprouts at Pike Place, I remembered my mom always being crazy about them, and I remembered that I was generally fairly disgusted by them. I also remembered that I think that disgust was based on smell, cooking method (steamed until super soft), and general childhood fussiness. However, I also remembered that a year ago, I was shocked by how much I loved the dish that Stacey had made for our group dinner.
So, I searched the internet for a recipe…and couldn’t find one. I could find recipes that incorporated one or another part of what I remembered, but couldn’t find the whole thing. So, with a few recipes in the back of my mind, I sort of just made it work. I was scared….it was worth it. It was a delicious side dish (I served it with Sole, aromatic veggies, and orzo, but it would have worked better with a stronger main dish…beef, chicken, pork, even a salmon or something). Sure, it’s not exactly healthy, but B.sprouts are full of nutrients (the darker, more colorful a vegetable, the more nutritious it is), and this is a great way to introduce them into your diet. Just make sure the rest of your meal isn’t full of bacon and cream, and you’ll be fine.
- The stuffs you need:
- 1 crate thingy of B.sprouts (probably about 2 cups, before we trimmed them?)
- 4 slices of bacon, cut into small (about 1/2 inch) pieces before cooking
- 1 large shallot, sliced
- 1/4 cup water or chicken stock/broth (obviously the stock/broth will add more flavor than the water)
- 1/4 – 1/2 cup heavy cream (this just depends on how much you want to add)
- A little parmesan cheese & fresh ground black pepper
- The cookings you do:
- First thing’s first…trim the B.sprouts. I’m not sure if we did this completely right, because it seemed like we almost halved the amount of veggie we had left by the time we cooked. I checked a couple websites, cooking blogs, random internet things to find out how to clean and trim, and they all talk about trimming the stem (where it’s harder, dried out) and the outer leaves (any that are loose or damaged or anything and could negatively affect the taste and texture of your food). The further in you get, it seems the leaves just get sweeter and more tender, so I guess over-trimming is better than under-trimming. Anyway, we (mostly Matt) trimmed all the B.sprouts and then cut them in half down the middle of the stem, so we had twice as many pieces, all with a flat side. Rinse and set aside.
- Delicious thing’s second…cook the bacon. If you’re going to chop or crumble bacon into a dish, it’s always easier to cut it into small pieces before you cook it. If your knife isn’t super sharp, it will be annoying, but you can get around this by either using kitchen shears (if you don’t have a pair of scissors set aside specifically for your kitchen, you really should) or by using slightly frozen bacon (I’d recommend the shears). The chopped bacon can go directly into a cold pan and cooked over medium high heat. It doesn’t need as much attention as bacon slices, but just stir it once in a while, and keep an eye on it. Take it out and drain on paper towels when it’s done to your desired crispness. Then hide the plate of bacon in the microwave or under a larger dish…or anywhere someone like Matt won’t pick at it. 🙂
- Drain off all but about 1 Tablespoon of the bacon grease and lower the heat to medium/medium low.
- Slowly cook the shallot in the pan with the bacon grease. You can cook them anywhere from soft and translucent to lightly caramelized. You can also use regular onion for this, but I really love the soft, sweet flavor of shallots.
- When the shallots are just before where you’d like them to be (they’ll cook a little bit longer), push them out to the sides of the pan, leaving a wide space directly on top of the burner. If your bacon grease is completely gone after cooking the shallots, spray a little cooking spray or add just a tiny bit of oil (or butter!) in the pan so the B.sprouts won’t stick.
- Place the B.sprouts in the center of the pan with the flat side face down, in one single layer. If your pan isn’t big enough to let them all squeeze in there in one layer, brown them in two layers, then put all of them back in the pan when you add the water/stock/broth later.
- On medium-ish heat, let the B.sprouts’ flat sides brown (about 4-5 minutes or so, until they get beautifully golden brown). Don’t stir them or move them around, but check one half-way through to make sure they aren’t burning.
- When they’re browned enough to make you smile, toss them gently together with the shallots (they might fall apart a bit, but that’s not a big deal), and add the water/broth/stock to the pan, stirring just a little to scrape up any yummy bits that have stuck to the bottom. Let this water/broth boil off for a few minutes, until it’s almost completely gone. This finishes cooking the B.sprouts, so if you want them firmer or softer, decrease or increase the liquid accordingly.
- Add the cream, stirring slowly, and stick by the pan from this point on, because the cream will thicken up quickly and will be pretty nasty if it burns.
- When your cream has thickened enough so that it’s coating the B.sprouts and is not soupy (if you find it’s too much cream, just decrease the amount you use), add parmesan cheese and black pepper to taste.
Leftovers Made Even Better
January 15th, 2008 Posted 4:13 pm
 Matthew and I had a dinner party last Friday…it was delicious and we had way too much food (are we shocked by this? NOT AT ALL). From leftovers, I made us a Pad Thai type dinner on Sunday…and unlike my many attempts to make Lo Mein for two people (usually ends up being enough for at least four), it made 2 bowls of delicious, and pretty nutritious dinner!Â
- 1 red pepper, sliced thin
- 1/2 cup of carrots, sliced into pieces about the same size as the pepper
- 1/2 cup frozen peas
- 1 Tb minced garlic
- 1 bunch of scallions, chopped
- 1/3 to 3/4 cup leftover peanut sauce (originally made from chicken broth, coconut milk, lime juice, soy sauce, peanut butter, cayenne pepper, garlic powder)
- About 1 cup of leftover shredded/chopped pork (it was a papaya-glazed recipe I had smashed together from a few different recipes, but you can really use any already cooked meat you like…or seafood…whatever)
- Chopped peanuts (unsalted)
- 1 package fresh Asian noodles
The pepper, garlic and scallions went into the sauté pan with a little canola oil (maybe 2 swirls around the pan) first. They’re called aromatics, and they develop their flavors first, making a really great flavor base for any dish…you could use spicy chilies or peppers, and onions or shallots. The carrots and peas went in shortly after this, because they need to cook. Meanwhile, the pasta was being cooked for about 3 minutes in boiling water. While the pasta is cooking, the peanut sauce and pork went into the pan, heating up with the vegetables…it should seem too thick to coat the pasta at this point, but that will get resolved. When everything in the pan is heated through and the pasta is cooked, the pasta was moved directly from the water into the veggie/pork/sauce pan, using tongs or a spaghetti fork…this brings some of the starchy pasta water along with it, thinning the sauce a little, and allowing it to coat the pasta and get everything mixed together. Divide into two dishes and top with peanuts.
Posted in Yum
Chili Cornbread Casserole
January 7th, 2008 Posted 2:03 pm
Â
- 1/2 pound ground turkey
- Chopped white or yellow onion
- 1 Tb minced garlic
- 1 can corn, drained
- 1 can petite diced tomatoes with chili peppers
- 1 can black beans, drained
- 1 can chili with beans
- 1/2 cup water
- Salt, pepper, paprika, cumin, chili powder, cayenne pepper (all to taste)
- 1 or 2 packages cornbread/muffin mix, prepared according to directions on package (I used two of the small boxes of Jiffy, which call for 1 egg and 1/4 cup milk for each box)
Season turkey and brown. Drain. Sauté onion and garlic in leftover grease from turkey, adding a little salt to draw out the onion’s liquid. Add corn and sauté to bring out the sweetness, add tomatoes, black beans, chili, and water. Bring to a simmer and cook on medium-low heat for 15 minutes. Taste and add seasoning to your preference. Cook for 15 more minutes, or until as thick as you desire. The longer you cook, the more the flavors will mingle and develop. Heat oven to 400 degrees (or the temperature called for on your cornbread mix). Pour chili mixture into baking dish and top with prepared cornbread batter. Bake according to package directions, although it will most likely need to cook slightly longer than that time to thoroughly cook the cornbread. Test middle of cornbread with toothpick or fork to check for doneness. If the top gets too brown before it is cooked through, cover with foil and continue cooking (the edges of mine browned quickly, so I put a layer of foil around the edges only, and the middle continued to brown).Â
This is delicious, makes a ton of food (enough for at least 6-8 people), and we spent at most $10 on the ingredients.
Posted in Yum