The amazing Meat Thermometer makes another great chicken breast
Last Thursday we had Yukon Gold Potatoes and ridiculously adorable tiny Baby Red Beets in our box from Full Circle Farm, so in an effort to use those this week I went with a roasted chicken dinner…a nice, comforting meal for Monday evening. I like to do something substantial either Sunday or Monday so it can be reused later in the week!
I used this recipe from Cooking Light online, but I had two chicken breasts in the freezer (bone-in, skin-on), so I used those instead of a whole chicken. Thanks to my handy dandy meat thermometer, I didn’t have to worry about watching the time too closely because I could rely on the temperature! I like to cook chicken on the bone with the skin on whenever I am doing something like roasting—it keeps so much flavor and moisture in the final product, especially if you’re dealing with white meat! I almost always take off the skin and remove the meat from the bones after the chicken rests, so you aren’t eating all of the fat with the skin or dealing with the bones when you’re trying to enjoy your meal. Having it on the bone does increase the amount of time it will take to cook, but I think it is definitely worth it. When you can monitor the temperature with a meat thermometer and pull it out a few degrees before it’s completely done and let it rest to the final temperature, it is amazingly moist. Matt is a huge dark meat guy and last night he said, “I can’t believe how moist this is! I can actually eat white meat!â€
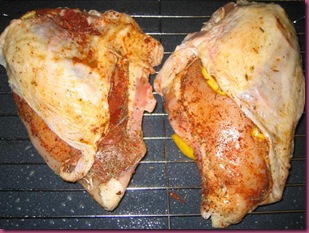 I rubbed a couple teaspoons of thyme and paprika under the skin of the chicken breast and placed a few thin slices of lemon under there as well. Both breasts went onto a rack in a deep pan and were rubbed with a tiny bit of olive oil. They then went into a 425 degree oven, covered, for 30 minutes. Then got uncovered and cooked until they got to 160 degrees. At that point they came out and rested, covered in foil while everything else finished up. The recipe calls for pan drippings to make a gravy, and breasts let off a lot less in the way of drippings than a whole bird would have. I forgot about this at first, until I opened the oven to remove the foil covering the chicken and got a face full of smoke from the very few drippings burning on the bottom of the pan…to deal with that and avoid setting off the smoke alarm, I added about half a cup of chicken broth to the bottom of the pan under the chicken.
I’m not sure if this slip up affected the pan sauce I made from the drippings, or if there was just an issue with the recipe, but when I followed the recipe straight and tasted it with Matt, it DEFINITELY needed adjusting. It was super lemony and really sweet! It tasted like candy lemon drops…not necessarily bad, but not exactly what I want with a chicken dinner! So I added a bit more broth, a little paprika and a few dashes of a chicken gravy package mix I had in the cupboard (why did I have this?!? It must have been on sale one day? I don’t remember buying it!). Eventually it got better and the flavor complemented all of the stuff on the plate, so it worked out!
Normally, when I make gravy from drippings I skim the fat, heat the drippings to simmering and then slowly add a slurry of cold broth/stock mixed with cornstarch. This is how my mom taught me (with ham gravy at Easter!), and I love it…at my parent’s house, we have a special shaker just for mixing and pouring the slurry! I usually add some herbs if necessary and some white or red wine, depending on the meat. This particular Cooking Light recipe started with flour in a heated pan, whisked with dry white wine and then called for the addition of broth, lemon juice, seasonings, the pan drippings and sugar (if I had left out the sugar, I probably could have avoided the initial candy sweetness).
This method wasn’t really any more difficult than the cornstarch method and I really liked it! I definitely won’t substitute it for my typical gravy, because the two methods result in completely different consistencies. Cornstarch lets the sauce thicken while still remaining a bit on the thinner side, while the flour will let you get to that thick thick super thick gravy stage (the kind you might make with sausage and put over fluffy biscuits for breakfast!).So hooray for adopting new gravy methods!
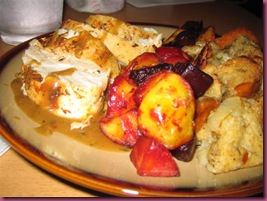
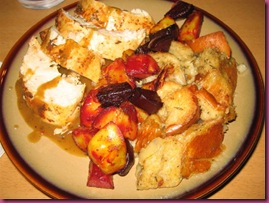
While all of this was going on, Matt and I peeled the beets and potatoes and cut them into tiny pieces, about 1 inch all the way around. They got tossed with a tiny bit of olive oil, salt and pepper and then roasted in with the chicken. I basically used the root veggie recipe I had made with the pork and apples a little while ago. I should have thrown them in the oven earlier, because in my opinion the beets could have gotten a little softer. I think they ended up cooking for a total of 45 to 55 minutes. They’ll get nice and soft when I use them as leftovers on Thursday! This is quickly becoming my favorite method for cooking root vegetables, and the texture of the Yukon Golds was a really nice, simple combination with the powerful sweet flavor of the beets.
We also had part of a loaf of French bread on hand that Matt and picked up this past weekend. I knew we wouldn’t get through all of it before it went stale, so I turned it into dressing! This was a really basic recipe, again from Cooking Light, that is really similar to the way I make cornbread dressing at Thanksgiving. Since I had less than a whole loaf, it was a little soggier than I would usually like, but it had such a delicious taste with just onions and sage! I didn’t have celery and can never figure out what to do with celery after I use one or two stalks since I don’t like it enough to snack on it. Does it freeze well?? Really nice and basic dressing that soaked up the not-quite-so-lemony sauce and paired well with the strong flavors on the chicken and veggies!
I think all the leftovers are going to get mooshed together into a casserole for after the gym tomorrow night…we went to an intro swim conditioning class at the gym tonight and didn’t get home until around 8pm (we had no desire to cook and grabbed Greek pita sandwiches on the way home!). Swim conditioning was crazy intense, plus I have been pushing my limits a bit all week. Sunday we went to play racquetball and spent 25 minutes on the elliptical machines first…I usually can’t do that machine for so long, so it was a stretch for me. Tuesday was Body Sculpting at work and I went up to 8lb weights for half of the weight portions. And tonight we got to the gym early so I did 20 minutes on a bike, not realizing how much pain my legs would be in after finishing almost an hour of swim conditioning! I will definitely be taking it easy tomorrow, since we’ve got another day of sculpting on Friday.Â
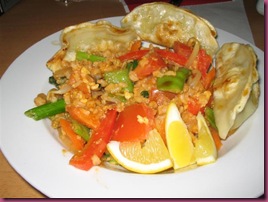
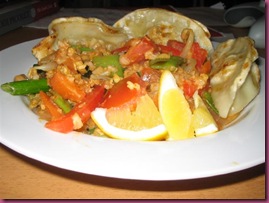
Oh! While I was moving my chicken pictures onto the computer, I realized I did have pictures of the fried rice (the death rice, devil rice or fire rice, as we’ve been calling it since then). It looks good…full of veggies, very innocent…don’t be deceived, it was evil. The potstickers were delicious though!
This entry was posted on Wednesday, March 18th, 2009 at 9:37 pm and is filed under Life, Matthew, Yum. You can follow any responses to this entry through the RSS 2.0 feed. You can leave a response, or trackback from your own site.


10:07 am on March 19th, 2009
Bread into dressing? That is crazy talk!
Your death rice looks inviting. 8 lb weights, u mucho strongs
5:38 pm on March 19th, 2009
Dressing is stuffing that isn’t made by putting it up a chickens butt.