Not-So-Baked Baked Goods
Last week, for Meghann’s Blogger Bake Sale, I contributed some Mix-And-Match Nut Butter Cups. All the proceeds of the bake sale went to Meghann’s Team In Training, and I couldn’t have been happier to help raise some money for such a good cause! And raise some money she did!! Meghann made a huge amount of money that all went towards fighting Leukemia and Lymphoma. Hooray!!
The winning bidder for my nut butter cups chose half Dark Chocolate with Peanut Butter and half Dark Chocolate with Almond Butter…nice and simple! Being more of a cook and less of a baker, nut butter cups are perfect for me to make, because there is no precise measuring, it’s done a lot by feel, AND I can get messy! Melting chocolate and molding peanut butter cups inevitably ends up with the stove, the counter, the kitchen sink, the table, and the freezer covered in splattered chocolate…weeks later I will find chocolate smeared on my elbow from rubbing up against something in or around the kitchen area. It’s spectacular!
I thought I would blog about my nut butter cups because Erin, of Walk in This World, is having a bake sale (and auction) too! This one is also for a great cause and I’m excited to contribute! This time I’m going to scour my cupboards and make a variety pack of nut butter cups with lots of flavor combinations for the high bidder! More info to come about the goodies in Erin’s bake sale.
In the meantime, here is the creation of the Mix and Match Cups from Meghann’s bake sale!
- Choose some good chocolate. We used organic dark chocolate chips from the Whole Foods bulk section. The bulk foods section of any store is really a major danger zone for me.
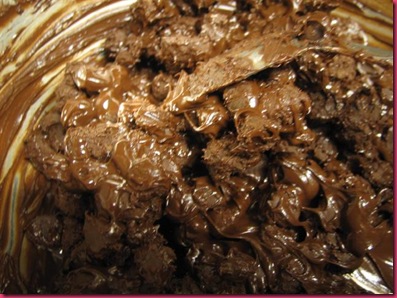
- Melt the chocolate! You can melt chocolate in the microwave or in a variety of ways really. But the best way that I’ve found is in a double-boiler setup. A small pot with 1-2 inches of water over medium low heat + A metal bowl over the water (not touching the water) + Chocolate chips. This will slowly heat up and the chocolate will look like a huge globby mess for a little bit.
 But then it gets warm enough and becomes a smooth, creamy, gorgeous bowl of melted chocolate and this is the danger point. It’s pretty tempting just to eat this with a spoon (or your hands), but resist. You need this to make your peanut butter cups!!!
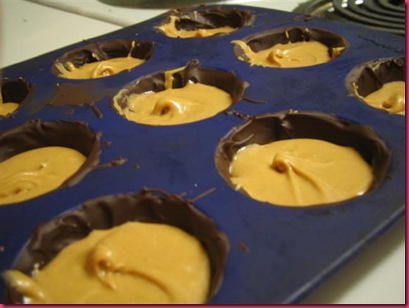
 - Coat your molds. I use mini muffin cups. I used one silicone pan and one metal pan. They both worked just fine. When I made Dori’s Almond Butter Carob Cups in March, I used some mini heart-shaped silicone ice trays. These were ADORABLE. When coating, you can use a brush or something, or just a small spoon. I have this tiny tiny tiny rubber spatula that is perfect. Make sure you coat all of it…any holes will leak out nut butter, and really, a cup with a hole is not a very good cup. If you want a thicker coating, just go back over them again after they’ve set for just a minute.
- Pop them in the freezer! They’ll only take a few minutes to harden….I usually do this in batches. Fill the molds and let them sit while I run an errand or go to work or whatever. When they’re solid, you can fill!
- Fill with nut butter!! When I fill them, I mix the nut butter with a little bit of powdered sugar. This makes the texture a little better for this kind of treat. You can definitely do without it.

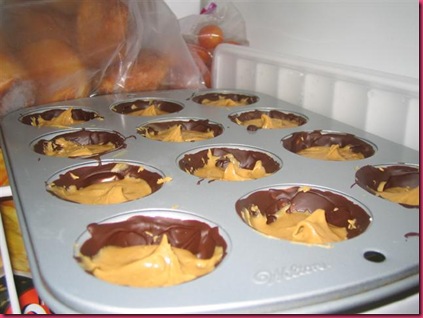
- Back in the freezer! You can definitely try to top them with more melted chocolate right away, but I’ve found that it sometimes gets all mixed up with the nut butter and then it’s just annoying. I pop these back in the freezer (the hardest part is making a flat space) and run another errand!

- Melt some more chocolate, exactly as above, and then top the cups! I usually tap the the tray on the counter to even out the tops and let the chocolate settle into any air spaces it can and then get them as full as possible, smoothing out the tops a little. They’re never totally smooth, but this gives them personality, so if you’re looking for perfect, don’t look here!
- Back in the freezer! I usually let these freeze overnight, just to make sure the top gets completely solid.
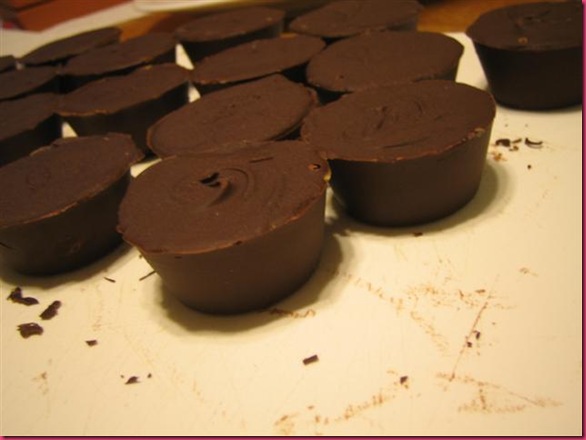
- Pop them out! The silicone is nicely flexible so you can get most of them out without a hitch. My metal pan is really nice and with just a little tapping, the hop right out on their own. Yum!

You can eat them frozen and they are delicious!! You can also let them get a little softer, but I’d recommend keeping them in the fridge to keep them from getting too gooey. I used natural peanut butter/almond butter, which should be in the fridge anyway. Usually, they’re probably going to be eaten too fast for it to matter!
This entry was posted on Thursday, April 16th, 2009 at 6:30 pm and is filed under interwebs, Non-Baking, Yum. You can follow any responses to this entry through the RSS 2.0 feed. You can leave a response, or trackback from your own site.


6:34 pm on April 16th, 2009
I love them both! I love when you make chocolates since I get to eat them!
6:52 pm on April 16th, 2009
Lady, thanks SO much for posting the link! Yay!
Srsly, I am going to have a VERY hard time not outbidding everyone for some of these. I tried really hard to get them on Meghann’s bake sale, but sadly lost. They just look so delicious and different!
7:06 pm on April 16th, 2009
OMG YUMMMMMMM wow they look so great this way! start a business!
6:27 am on April 17th, 2009
I agree that a cup with a hole is not a very good cup
I love the description on how you made these, I had no idea! I like my pretty heart ones!
6:44 pm on April 19th, 2009
Your kitchen’s messy? So are my fingers and my mouth!
Oh wow! I just finished eating one peanut butter cup and one almond butter cup. I am in HEAVEN. Now you are showing me how to make my very own??? I think this is a life changing moment. 🙂
I USED to love Reese’s PB cups. Now there’s no way I can ever stomach one of those again.
Everyone…bid high for these…they are AMAZING.
Angelea
10:09 pm on May 25th, 2009
[…] nut butters. I love sending yummy treats to excited bake sale winners, but these babies are easy to make for yourself […]