Archive for the ‘interwebs’ Category
…Again
April 22nd, 2009 Posted 10:32 am
Still in Oregon…at least today’s fair was only 15 minutes from my hotel, so no crazy morning driving like the last couple days! Yesterday’s lunch was SO GOOD (for a catered lunch at a university anyway). Veggie trays, salad, Black Bean Corn Fiesta Rice, 5 choices of wraps (I chose chicken Caesar, because I’m predictable), cookie trays, lots of drink choices! Yum! The wrap was one of the best chicken Caesar wraps I’ve had….it was basically a chicken salad type filling, made with Caesar dressing instead of mayo, with some onions, and wrapped with some really nice red leaf lettuce, all on a tomato wrap. So good! I spread my lunch out throughout the day because the fair was 6 freakin’ hours long. I got some work emails answered and other random things done in the chunks of time when I wasn’t talking to prospects, so it was a pretty productive and yummy 6 hours all around.
Because I had the salad and the wrap for lunch, I wasn’t in the mood for a sandwich or salad from the organic place next to the hotel, so I walked 15 minutes or so down the road to a Mexican restaurant. I munched on chips and salsa and ordered a small combination plate with an enchilada and tamale along with rice and beans. Decent Mexican, not the best, not the worst. Very satisfying. I also ordered a small melon margarita…YUM! Piece of advice: DO NOT HAVE A FILLING MEXICAN MEAL AND A MARGARITA KNOWING THAT YOU HAVE TO WALK AFTERWARDS! It wasn’t a long walk, and I called Matt on the way, but it was hot and my tummy was full, and I just wanted to be back in the hotel resting!
A very serious matter: Missy, over at Missy Maintains, is having a Big S Farms Salsa recipe contest and I entered! Go now and vote for your favorite!! (if you can’t choose a favorite, just vote for me, it will be ok, I promise)
Also don’t forget to enter Dori’s doormat giveaway!
Are any of you looking for afghans?? It might be getting warm now, but think of how chilly you get in the middle of January! Well, my mom crochets like a fiend and makes tons and tons of afghans…she constantly has at least 2 or 3 going. Anyway, I showed her the Etsy website and she put some of her afghans up for sale. Guys, I have SO many afghans right now. They’re amazing and they last for a long time (unless you give them to Santana, who digs digs digs them and they get full of puppy fur). She is still working on getting her Etsy shop all set up, so it’s bare bones basics with pictures of the afghans she already has done right now, but more to come! So if you’re looking for a homemade gift or a cuddly throw for your own couch, show my mom some love!
Some contests you should check out for Earth Day celebration:
Danica’s Daily’s Annie’s Naturals Dressings Giveaway (three winners!!!)
Run to the Finish is giving away Baumann’s products (YUM!)
Carrots ‘N’ Cake’s Stonyfield Giveaway!
Cooking with Amy’s Scanpan and cookbook giveaway!
Celebration and a New Meal!
April 20th, 2009 Posted 11:22 am
Hey hey hey! Look up! A Bacon-Wrapped Life is now located at it’s very own domain name baconwrappedlife.com!!! EXCITEMENT! Also exciting, Dori’s Shiny Blog is now located at dorishinyblog.com, check it out and keep your eyes peeled for some fun on her end to celebrate the change!!
I’ve been absent from the blog for a few days because we were switching servers, updating names, and just generally being busy with chores, errands and some nice weather But I have a yummy new recipe to show for the missing weekend!
This is a conglomeration of this cooking light recipe and a pumpkin ravioli recipe I tried about 4 years ago and turned into an AMAZING pumpkin lasagna recipe that I’ll probably share at some point.
Spicy Sweet Butternut Squash Ravioli with Prosciutto and Parmesan
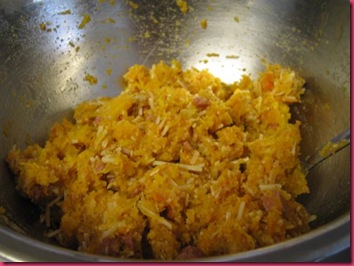
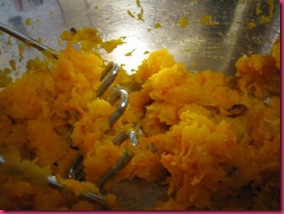
I roasted the heck out of a butternut squash at 400 degrees for about an hour or so, then scooped it out of the peel (after it cooled) and mashed it. In a pan with a bit of olive oil, I sautéed 4oz diced prosciutto until it was a little crispy on the edges. Half of the meat went into the squash along with breadcrumbs, 1 egg, salt, and parmesan cheese.
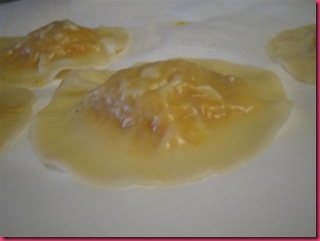
I bought a package of wonton wrappers, and these made the ravioli! I filled a wonton wrapper with about 1Tb of the squash mixture, wet the edges with water, topped with another wrapper and sealed all around, making sure to get out all of the air bubbles. I used a biscuit cutter to cut into rounds and set them aside on a parchment-lined tray.
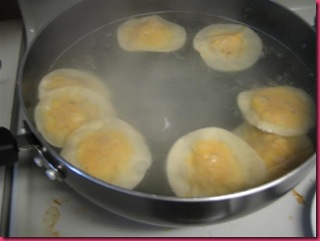
I made 20 ravioli like this and still hade some wrappers and squash mixture left, but knew we wouldn’t eat them, so I just stuck with the 20 (good thing, because I was stuffed by the end of the meal!). Brought a big, wide pan full of water to a simmer and cooked about half of the ravioli at a time, for about 5 minutes with each batch. I pulled them out with a slotted spoon and let them wait on the parchment-lined baking sheet while I cooked the second batch.
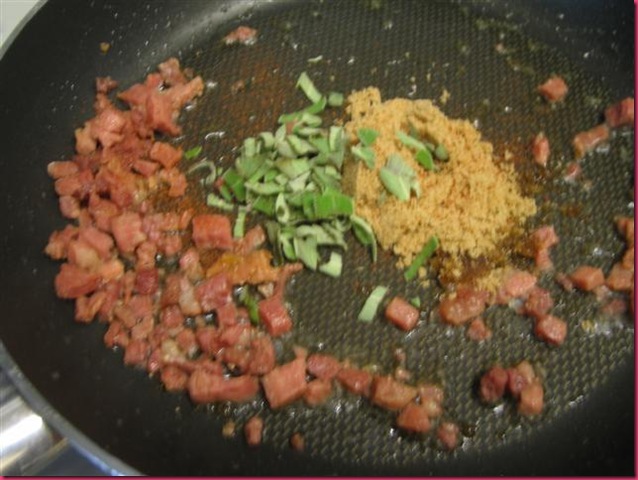
As the second batch of ravioli cooked, I heated the remaining prosciutto and olive oil back up and added a little over a tablespoon of brown sugar, a few chopped sage leaves, a pat of butter and a dash of cayenne pepper for a little kick.
After this got all melty, I sort of just wanted to eat it with a spoon!
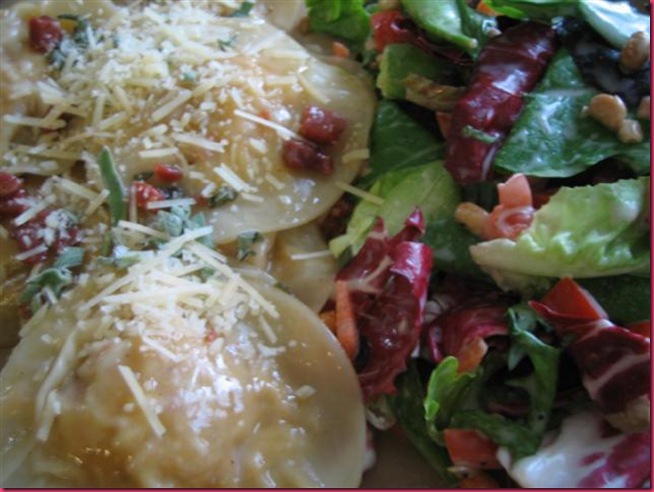
I melted this over medium-low heat and then tossed it with the ravioli and served, topped with a little more fresh sage and some parmesan! Pretty easy (a little time-consuming because you have to fill the ravioli) and SUPER delicious! You could also buy ravioli and just make this prosciutto brown sugar sauce to coat them, and it would be really really easy.
We served it with a bagged Pacific salad with a bunch of different greens, soy nuts, carrots and a poppy seed dressing. Plus we added a bunch of diced tomatoes from our CSA! It was a nice accompaniment to the ravioli, which had a wonderful balance of the nutty squash, sweet brown sugar, salty prosciutto & parmesan, and a tiny bit of spice from the cayenne!
Posted in Blog Fun, Fun, interwebs, Life, Magical Magical Animal, Matthew, Southern Love, Yum
Not-So-Baked Baked Goods
April 16th, 2009 Posted 6:30 pm
Last week, for Meghann’s Blogger Bake Sale, I contributed some Mix-And-Match Nut Butter Cups. All the proceeds of the bake sale went to Meghann’s Team In Training, and I couldn’t have been happier to help raise some money for such a good cause! And raise some money she did!! Meghann made a huge amount of money that all went towards fighting Leukemia and Lymphoma. Hooray!!
The winning bidder for my nut butter cups chose half Dark Chocolate with Peanut Butter and half Dark Chocolate with Almond Butter…nice and simple! Being more of a cook and less of a baker, nut butter cups are perfect for me to make, because there is no precise measuring, it’s done a lot by feel, AND I can get messy! Melting chocolate and molding peanut butter cups inevitably ends up with the stove, the counter, the kitchen sink, the table, and the freezer covered in splattered chocolate…weeks later I will find chocolate smeared on my elbow from rubbing up against something in or around the kitchen area. It’s spectacular!
I thought I would blog about my nut butter cups because Erin, of Walk in This World, is having a bake sale (and auction) too! This one is also for a great cause and I’m excited to contribute! This time I’m going to scour my cupboards and make a variety pack of nut butter cups with lots of flavor combinations for the high bidder! More info to come about the goodies in Erin’s bake sale.
In the meantime, here is the creation of the Mix and Match Cups from Meghann’s bake sale!
- Choose some good chocolate. We used organic dark chocolate chips from the Whole Foods bulk section. The bulk foods section of any store is really a major danger zone for me.
- Melt the chocolate! You can melt chocolate in the microwave or in a variety of ways really. But the best way that I’ve found is in a double-boiler setup. A small pot with 1-2 inches of water over medium low heat + A metal bowl over the water (not touching the water) + Chocolate chips. This will slowly heat up and the chocolate will look like a huge globby mess for a little bit.
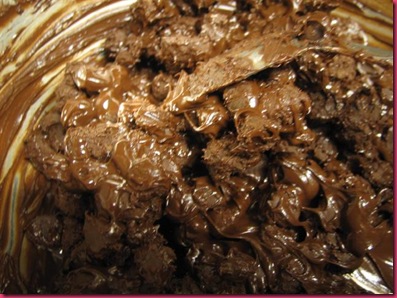 But then it gets warm enough and becomes a smooth, creamy, gorgeous bowl of melted chocolate and this is the danger point. It’s pretty tempting just to eat this with a spoon (or your hands), but resist. You need this to make your peanut butter cups!!!
 - Coat your molds. I use mini muffin cups. I used one silicone pan and one metal pan. They both worked just fine. When I made Dori’s Almond Butter Carob Cups in March, I used some mini heart-shaped silicone ice trays. These were ADORABLE. When coating, you can use a brush or something, or just a small spoon. I have this tiny tiny tiny rubber spatula that is perfect. Make sure you coat all of it…any holes will leak out nut butter, and really, a cup with a hole is not a very good cup. If you want a thicker coating, just go back over them again after they’ve set for just a minute.
- Pop them in the freezer! They’ll only take a few minutes to harden….I usually do this in batches. Fill the molds and let them sit while I run an errand or go to work or whatever. When they’re solid, you can fill!
- Fill with nut butter!! When I fill them, I mix the nut butter with a little bit of powdered sugar. This makes the texture a little better for this kind of treat. You can definitely do without it.
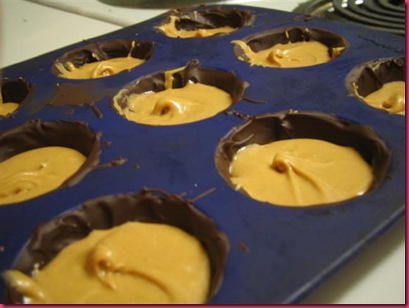
- Back in the freezer! You can definitely try to top them with more melted chocolate right away, but I’ve found that it sometimes gets all mixed up with the nut butter and then it’s just annoying. I pop these back in the freezer (the hardest part is making a flat space) and run another errand!
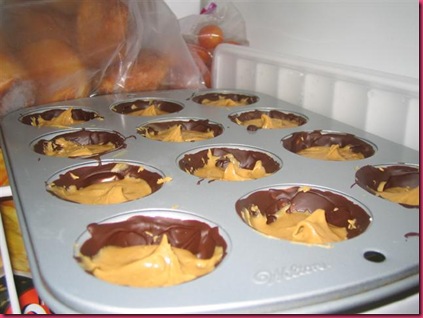
- Melt some more chocolate, exactly as above, and then top the cups! I usually tap the the tray on the counter to even out the tops and let the chocolate settle into any air spaces it can and then get them as full as possible, smoothing out the tops a little. They’re never totally smooth, but this gives them personality, so if you’re looking for perfect, don’t look here!
- Back in the freezer! I usually let these freeze overnight, just to make sure the top gets completely solid.
- Pop them out! The silicone is nicely flexible so you can get most of them out without a hitch. My metal pan is really nice and with just a little tapping, the hop right out on their own. Yum!
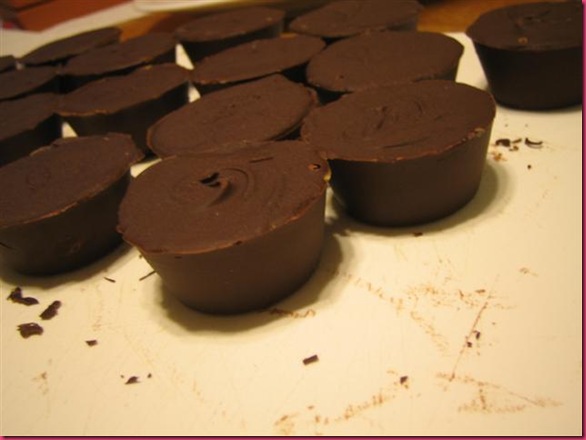
You can eat them frozen and they are delicious!! You can also let them get a little softer, but I’d recommend keeping them in the fridge to keep them from getting too gooey. I used natural peanut butter/almond butter, which should be in the fridge anyway. Usually, they’re probably going to be eaten too fast for it to matter!
Posted in interwebs, Non-Baking, Yum
Creamy Asparagus Soup and Roasted Veggies – A healthy dinner, topped with bacon and followed with a sugar rush for dessert!
April 14th, 2009 Posted 1:44 pm
Last week we had HUGE asparagus stalks in our CSA box. I have never seen asparagus quite so massive. With the chilly weather and a lack of creativity, I stole this recipe from Maeve for Asparagus soup and switched it up a bit to make a pretty quick weeknight dinner that lasted through two rounds of leftovers. We had soup again on Sunday with our potato cakes leftover from the Passover/Easter dinner, and AGAIN on Monday with some egg salad sandwiches. Yum!! It’s finally gone now, but it was definitely worth the minor effort I put into it 🙂
Maeve is amazing and made an asparagus based stock for her soup….I used veggie broth from a box. It was the middle of the week. Just deal with it :) I also had a different set of vegetables on hand, and didn’t feel like going to the store, so the variety in the soup got switched up a bit as well. This is where the stalks of our Red Swiss Chard (previously noted in the side-dish yuckiness from this past weekend) came into play. I also bacon-ed it up a bit because we had some bacon in the fridge that needed to be used up quickly. This made the original dish AMAZING, but we had it without bacon both times we had leftovers and it was still mucho delicious.
- 1 Box Vegetable Stock
- 2 Tb Olive Oil
- 1 onion, chopped
- 1 Bunch asparagus, tops reserved (we also had some leftover stalks frozen from our yummy asparagus side dish that we served with pan fried scallops a while ago)
- 2 small potatoes, diced
- 2 cloves crush garlic
- Stalks from 1 bunch of red swiss chard, chopped small
- Salt & Pepper
- 1/4 cup milk
- Bacon!
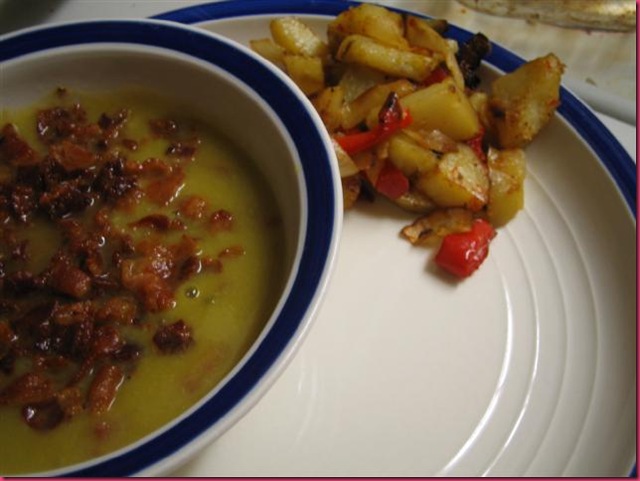
Heat olive oil in large stockpot. Sauté middle portions of asparagus stalks, chopped onion, potatoes, and garlic until a little brown. Add stock to cover and simmer until the veggies are nice and soft. Puree (I used our wonderful stick blender!). Turn it on low heat and add Simmer for 20 minutes covered until vegetables can be mashed with the back of a spoon. Puree soup until smooth. Return to a very low heat and add milk, asparagus tops, and chopped chard stalks. Cook on low until the veggies are cooked through (the chard will take a little longer than the asparagus, so you may want to add the asparagus a few minutes after the chard). While this was happening, we had chopped the bacon and then cooked slowly over medium-low heat to render out as much fat as possible, then cranked the heat to get it nice and crispy. This went on top of the soup! Yum!
We also roasted some potatoes, red peppers, onions and garlic coated in olive oil to serve alongside. When we were cleaning up after dinner, we threw the handful of leftover roasted veggies into the soup and it became a creamy asparagus vegetable soup for the rest of its yummy career.
Thanks for the inspiration Maeve!!
Matt made dessert! We had a package of strawberries from our CSA and he grabbed some angel food cake and whipped cream at the store. This was a complete sugar overload and so huge I couldn’t finish, but a satisfyingly sweet to end the evening.
Guest Post on Dori’s Shiny Blog
April 9th, 2009 Posted 11:17 am
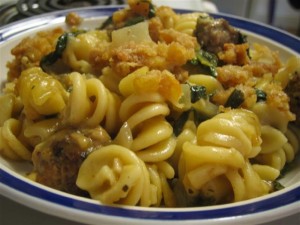
Click over to Dori’s blog to read my guest post about my Italian Wedding Casserole! Lots of pictures and the Sage Parmesan Meatball recipe! This is a really fun meal that Matt and I made together and has lasted through several rounds of leftovers…yum yum yum! Here are the instructions for putting the casserole together (you’ll have to head over to DSB to get the meatball recipe!):
- What You Need:
• Pasta (We used Rotelle, but any curly or spiral pasta will work)
• About 1/3 of the sage parmesan meatball mix
• Chicken stock
• 1 Tb Flour
• 1 Tb olive oil
• 1 Tb Minced garlic
• 1 Diced onion
• 1 bunch fresh spinach, washed, drained, and chopped. (Or frozen spinach, defrosted, drained, squeezed as dry as possible)
• Ritz crackers
• Butter
• Parmesan Cheese
• Salt and Pepper
• Basil, parsley, sage, cayenne pepper
Â
- What You Do:
• Cook pasta, as directed on package, drain, and set aside.
• While pasta cooks, mix your meatballs and pan fry.
• Remove with a slotted spoon and drain on paper towels — if there is a ton of grease in the pan, pour off or soak up (with a paper towel) most of it, leaving about 1/2 a teaspoon
• Sprinkle flour around pan, stirring to coat with grease in the pan and let it cook for a couple minutes on medium heat (this will take away some of the floury taste)
• Add salt, black and cayenne pepper, basil, parsley and sage and slowly add stock, stirring constantly and mixing completely with the flour after each bit is added.
• When all the stock has been added to the pan, keep stirring so it doesn’t burn or stick. Bring it to a simmer and let it cook for 5 minutes. This will get it just a little bit thick.
• While sauce is cooking, heat olive oil in pan over medium-high heat.
• Sauté onion and garlic in pan until very soft and translucent (caramelized a bit if you want that extra sweetness).
Add spinach to pan and stir. As the spinach cooks it will wilt down quite a bit. It might seem like you have a TON of fresh spinach, but it will result in a lot less cooked than you think.
• Cook until spinach is wilted and tender, stirring constantly. Set aside.
• In a large bowl, mix pasta, meatballs, spinach, stock mixture and a handful of parmesan cheese until well blended.
• Pour into large, greased casserole dish.
• In small saucepan, melt 1 stick of butter. Crush 1 tube of Ritz crackers (you can really use any kind of crackers you want, but Ritz are super buttery and have the best taste as far as I’ve found so far)and add to the melted butter (along with a small handful of parmesan cheese), stirring to coat.*
• Top the casserole with the deliciously buttery cracker mix.
• Bake this in 350 degree oven for 20-30 minutes or until bubbly and hot in the middle. The time will vary based on what size/shape casserole dish you use. You’ll want to watch the crackers, because they could burn if the oven is too hot or they’re in there too long…if you see them starting to get too dark, just cover with aluminum foil. Since everything is already cooked, you’re really just aiming for it to be heated and bubbly all the way through and for the cracker topping to get nice and brown!Â
*It should be noted that the topping on this casserole comes originally from a broccoli cheese casserole side dish I learned from my greasy friend from KY, Bob…while we were Undergrads, we spent a LOT of time topping things with butter and crackers. It’s delicious.
Thanks to Dori for letting me guest post! 4th bar review later today after my afternoon snack! (The last of the leftover italian wedding casserole for lunch today, so that will probably hold me over for a while!)
Posted in Fun, interwebs, Life, Matthew, Southern Love, super-friends, Yum

