Archive for March, 2009
Leftovers, random snacking, Swimming Caps and another giveaway!
March 19th, 2009 Posted 5:53 pm
Today is a non-picture, boring day of food blogging. Pretty yummy though!
– Chocolate Croissant and my twice-weekly white chocolate mocha from Fresh Flours, which we luckily live near!
– Lots of emails, conference calls and applications sent me all the way to lunch without a snack! I was on the phone with my grandma at noon when my tummy went crazy growling at me for some food!
– I couldn’t take any more of the devil rice, so I went with curried lentil soup (w/ oyster crackers!!) and crunchy veggies (carrots, cukes, and broccoli) with the yummy homemade ranch dressing from the cafeteria. Delicious and pretty filling!
– Strawberry fruit leather after lunch to get some fruit and sweetness into the meal!  – Organic Fair Trade Hot Cocoa from Trader Joe’s (thanks to one of the other advisors!) and Sunny Bears (Whole Foods’ version of gummy bears!) for an afternoon snack!
Now I am thinking about leftovers for dinner! A casserole from Monday’s roast chicken and veggies!
I think my body is extra hungry today after yesterdays crazy swim workout! It has been quite a while since Matt and I have done any serious swimming, and neither of us has ever done super-serious drill-type swimming, so the 45 minutes or so of straight laps and various strokes and breathing exercises and all on top of some random working out before the swim class kicked our butts. I feel great today though, just crazy hungry!! We need to get swimming goggles and I need a swim cap. I have horrible memories of these from being a little kid with tubes in my ears and needing to shove wax in my ears and wear a swim cap anytime I went near the water!!
One of my co-workers said she got this cute swim cap and I have been searching online for a non-boring one! The website that seems to have lots of different choices is Headcovers Unlimited. Any suggestions on cute ones I should try?? I wish I were a little kid so I could try some of the really cute fun ones!
—-
Another giveaway!! Angela at Oh She Glows is giving away some POM Coupons! I have been on a pomegranate kick lately, so this is especially exciting!
The amazing Meat Thermometer makes another great chicken breast
March 18th, 2009 Posted 9:37 pm
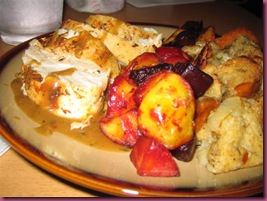
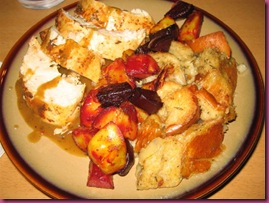
Last Thursday we had Yukon Gold Potatoes and ridiculously adorable tiny Baby Red Beets in our box from Full Circle Farm, so in an effort to use those this week I went with a roasted chicken dinner…a nice, comforting meal for Monday evening. I like to do something substantial either Sunday or Monday so it can be reused later in the week!
I used this recipe from Cooking Light online, but I had two chicken breasts in the freezer (bone-in, skin-on), so I used those instead of a whole chicken. Thanks to my handy dandy meat thermometer, I didn’t have to worry about watching the time too closely because I could rely on the temperature! I like to cook chicken on the bone with the skin on whenever I am doing something like roasting—it keeps so much flavor and moisture in the final product, especially if you’re dealing with white meat! I almost always take off the skin and remove the meat from the bones after the chicken rests, so you aren’t eating all of the fat with the skin or dealing with the bones when you’re trying to enjoy your meal. Having it on the bone does increase the amount of time it will take to cook, but I think it is definitely worth it. When you can monitor the temperature with a meat thermometer and pull it out a few degrees before it’s completely done and let it rest to the final temperature, it is amazingly moist. Matt is a huge dark meat guy and last night he said, “I can’t believe how moist this is! I can actually eat white meat!â€
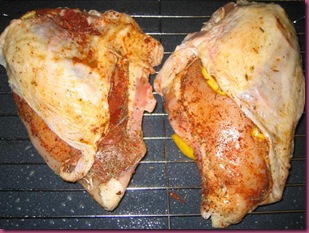 I rubbed a couple teaspoons of thyme and paprika under the skin of the chicken breast and placed a few thin slices of lemon under there as well. Both breasts went onto a rack in a deep pan and were rubbed with a tiny bit of olive oil. They then went into a 425 degree oven, covered, for 30 minutes. Then got uncovered and cooked until they got to 160 degrees. At that point they came out and rested, covered in foil while everything else finished up. The recipe calls for pan drippings to make a gravy, and breasts let off a lot less in the way of drippings than a whole bird would have. I forgot about this at first, until I opened the oven to remove the foil covering the chicken and got a face full of smoke from the very few drippings burning on the bottom of the pan…to deal with that and avoid setting off the smoke alarm, I added about half a cup of chicken broth to the bottom of the pan under the chicken.
I’m not sure if this slip up affected the pan sauce I made from the drippings, or if there was just an issue with the recipe, but when I followed the recipe straight and tasted it with Matt, it DEFINITELY needed adjusting. It was super lemony and really sweet! It tasted like candy lemon drops…not necessarily bad, but not exactly what I want with a chicken dinner! So I added a bit more broth, a little paprika and a few dashes of a chicken gravy package mix I had in the cupboard (why did I have this?!? It must have been on sale one day? I don’t remember buying it!). Eventually it got better and the flavor complemented all of the stuff on the plate, so it worked out!
Normally, when I make gravy from drippings I skim the fat, heat the drippings to simmering and then slowly add a slurry of cold broth/stock mixed with cornstarch. This is how my mom taught me (with ham gravy at Easter!), and I love it…at my parent’s house, we have a special shaker just for mixing and pouring the slurry! I usually add some herbs if necessary and some white or red wine, depending on the meat. This particular Cooking Light recipe started with flour in a heated pan, whisked with dry white wine and then called for the addition of broth, lemon juice, seasonings, the pan drippings and sugar (if I had left out the sugar, I probably could have avoided the initial candy sweetness).
This method wasn’t really any more difficult than the cornstarch method and I really liked it! I definitely won’t substitute it for my typical gravy, because the two methods result in completely different consistencies. Cornstarch lets the sauce thicken while still remaining a bit on the thinner side, while the flour will let you get to that thick thick super thick gravy stage (the kind you might make with sausage and put over fluffy biscuits for breakfast!).So hooray for adopting new gravy methods!
While all of this was going on, Matt and I peeled the beets and potatoes and cut them into tiny pieces, about 1 inch all the way around. They got tossed with a tiny bit of olive oil, salt and pepper and then roasted in with the chicken. I basically used the root veggie recipe I had made with the pork and apples a little while ago. I should have thrown them in the oven earlier, because in my opinion the beets could have gotten a little softer. I think they ended up cooking for a total of 45 to 55 minutes. They’ll get nice and soft when I use them as leftovers on Thursday! This is quickly becoming my favorite method for cooking root vegetables, and the texture of the Yukon Golds was a really nice, simple combination with the powerful sweet flavor of the beets.
We also had part of a loaf of French bread on hand that Matt and picked up this past weekend. I knew we wouldn’t get through all of it before it went stale, so I turned it into dressing! This was a really basic recipe, again from Cooking Light, that is really similar to the way I make cornbread dressing at Thanksgiving. Since I had less than a whole loaf, it was a little soggier than I would usually like, but it had such a delicious taste with just onions and sage! I didn’t have celery and can never figure out what to do with celery after I use one or two stalks since I don’t like it enough to snack on it. Does it freeze well?? Really nice and basic dressing that soaked up the not-quite-so-lemony sauce and paired well with the strong flavors on the chicken and veggies!
I think all the leftovers are going to get mooshed together into a casserole for after the gym tomorrow night…we went to an intro swim conditioning class at the gym tonight and didn’t get home until around 8pm (we had no desire to cook and grabbed Greek pita sandwiches on the way home!). Swim conditioning was crazy intense, plus I have been pushing my limits a bit all week. Sunday we went to play racquetball and spent 25 minutes on the elliptical machines first…I usually can’t do that machine for so long, so it was a stretch for me. Tuesday was Body Sculpting at work and I went up to 8lb weights for half of the weight portions. And tonight we got to the gym early so I did 20 minutes on a bike, not realizing how much pain my legs would be in after finishing almost an hour of swim conditioning! I will definitely be taking it easy tomorrow, since we’ve got another day of sculpting on Friday.Â
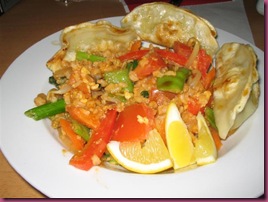
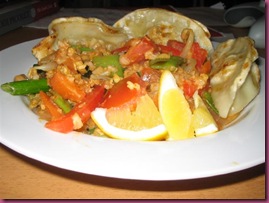
Oh! While I was moving my chicken pictures onto the computer, I realized I did have pictures of the fried rice (the death rice, devil rice or fire rice, as we’ve been calling it since then). It looks good…full of veggies, very innocent…don’t be deceived, it was evil. The potstickers were delicious though!
Regular Yogurt vs. Greek Yogurt
March 18th, 2009 Posted 1:59 pm
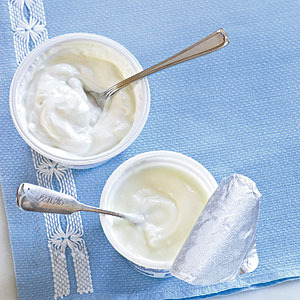
I just found this! How relevant! Regular yogurt has a few more calories and a bit more sodium, but WOW look at how much calcium you’re getting from the regular! Both good health choices though!
Posted in Uncategorized
Oikos Greek Yogurt and more Giveaways!
March 17th, 2009 Posted 8:28 am
Kristina, from Stonyfield Farm, sent me some coupons for Oikos Greek Yogurt! Excitement! I have always just eaten regular yogurt-Dannon, Lucerne, etc.-since I was little, so I’m used to the thin, super sweet quality of that. Greek yogurt is a new adventure for me, and this morning I had my first Oikos Vanilla. From their website:
Called “yiaourti” in Greece, Greek yogurt is creamier than regular yogurt. Authentic Greek yogurt like ours owes its extra creaminess to a centuries-old straining process that removes the whey (liquid) from the yogurt.
For hundreds of years, Greeks have prized strained yogurt for its richness and creaminess, and because it makes a great cooking ingredient that’s less likely to curdle when heated. Today, we know that straining also makes Greek yogurt richer in protein than regular yogurt, and lower in lactose.
Oikos Organic Greek Yogurt has 0% fat, just 90 calories per 5.3 oz.-serving*, twice the protein of regular yogurt, and fewer carbohydrates. Because it’s organic, Oikos is also better for the earth. And we think it’s better for you, too!
*5.3oz. plain
The vanilla taste was nice and after eating a bit, I added some pumpkin butter (thanks to Dori!), which made it a completely addicting flavor. The texture took some getting used to-if you’re not used to it, this yogurt is much much thicker and has a bit of a fine, grainy texture to it. I finished the whole container and was overall pretty pleased. I don’t have any basis to compare it to other Greek yogurts like Chobani…for more info on comparisons, Dori has some experience! I have a few more coupons and want to try some other flavors. The main issue for me is that they are pretty expensive – where we got the first one, they are $2.50 for a regular sized yogurt! If I ate yogurt 5 days a week for a month, that is a third of our entire grocery budget! I’m not sure I can afford Oikos right now on a regular basis, but as long as I have the coupons I will keep taste-testing and I can always splurge a little bit on a treat once in a while!
After I got to work, my tummy wanted something substantial and someone had brought in some Quaker Vanilla Almond oats so I heated some of those up…blah. Not wonderful. I think I’ll try an Odwalla bar in a bit to hold me until lunch (more leftover spicy spicy spicy rice). Today’s flavor: Berries GoMega with 1000mg of Vegetarian Omega-3’s!

Last night we had a yummy roast chicken, veggies and French bread dressing meal that I’ll post with pictures later. There is a good chunk of that leftover, so hopefully we’ll turn that into a second meal on Wednesday. It makes me very happy to re-use meals and get the most out of them! Tuesday is International Dinner night out with friends (used to be “Thai Tuesday” until our Thai place started construction for who knows how long), so no cooking or dishes to do tonight-nice mid-week break!
A few more blog giveaways to note:
– Really, really, really craving that Mix My Granola? Diana at Soap and Chocolate is giving some away as well!
– Jenn at Eating Bender is celebrating her 1st blogiversary with a fun giveaway involving trivia, adorable mugs and more!
Whole Wheat Strawberry Pancakes and the Spiciest Fried Rice in History
March 16th, 2009 Posted 8:19 pm
On Saturday, Santana actually let us sleep in a little bit (after she went outside and got breakfast by 7, of course!), so instead of having breakfast, we had a mid-morning brunch-type meal that ultimately messed up our entire eating schedule for the day and resulted in a super-late dinner!
Another healthy thing to mention first: Emily at the health nut has a great Green Tote giveaway going on through Friday! I like to think healthy and green when I can, even though our lifestyle might be a bit indulgent at times…great healthy blogs give me lots of ideas about how to incorporate more and more healthiness without even thinking about it!
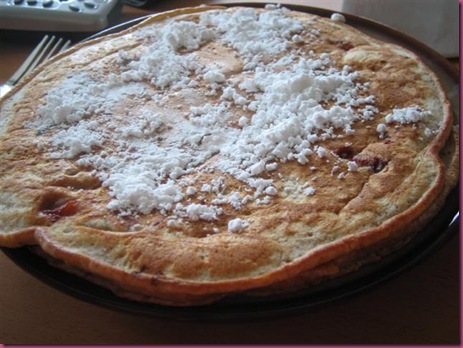
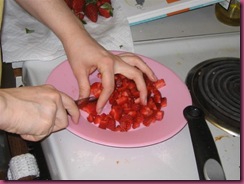
We had gotten a gorgeous package of organic strawberries (not local, obviously, but still delish) through our CSA box on Thursday, so I chopped those up to make into pancakes! I am not always a huge fan of pancakes, because they are sometimes way too fluffy for me. I lean towards the super-thin crepes over the pumped-up fluffy pancakes. Matt loves pancakes though, and if I make them at home I can control the texture and usually enjoy them a lot.
I started with a recipe from Alton Brown’s I’m Just Here For More Food, which is the cookbook that follows I’m Just Here for the Food: Food + Heat = Cooking. The second book focuses on baked goods and for his pancakes he uses “The Muffin Methodâ€. I love these books for the same reason I love watching Good Eats and anything Alton Brown really…he actually explains the science behind what’s going on with the food. Gives you a formula, a method for doing something and a few recipes that follow that formula. Since you know the formula, you can change the recipe to suit your own desires! Sometimes it’s a little on the corny side and makes you want to roll your eyes, but at the end of the episode/page/rambling you understand why the meat turns brown, why the batter rises when you cook it, why you don’t want to use too much flour when you’re breading chicken. Plus, in I’m Just Here for the Food there are these awesome diagrams of a cow and a pig, outlining where all the cuts of meat come from…this makes me happier than I can describe. I use his books less often for the recipes, and more often for the techniques, tips, and general ability to understand what’s going on when I cook. I absolutely recommend them for anyone who wants to cook on a regular basis without recipes—after enough AB, you can do a lot of basic things without even thinking about it, because you know the science! Alton Brown is my geeky food crush…let’s just take a minute to come to terms with that.
.
.
.
.
.
.
.
Ok, enough of that…here’s the recipe, with pictures of my oddly shaped pancakes along the way.
Alton Brown had 2 recipes: Buttermilk and Whole Wheat Pancakes. I added the strawberries because we had them, and I went with the whole wheat because we had whole wheat flour in the cupboard and it’s just tasty!
What you need:
- Whole Wheat Flour (2 cups)
- Baking Powder (1 tsp)
- Baking Soda (1/2 tsp)
- Salt (1tsp)
- Sugar (3 Tb)
- Eggs (2 large)
- Buttermilk (2 cups at room temperature) **I didn’t have buttermilk so I used regular milk with a couple tablespoons of lemon juice added while it came to room temp**
- Unsalted butter (4 Tb, melted and slightly cooled)
- STRAWBERRIES! (I used a whole small container)
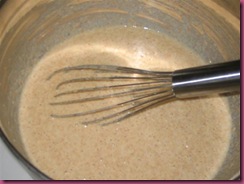
The Muffin Method, as described in the book, is pretty basic and easy. The dry stuff (flour through sugar) get mixed together quickly, then the wet stuff gets mixed together separately (eggs through butter). The wet goes into the dry and they get stirred together just until combined, not until smooth. For The Muffin Method to work, you cannot overmix! Super important…Alton Brown puts it in big bold letters several times: DO NOT OVERMIX! The Muffin Method creates a cross section that looks like, well…a muffin: different sized air pockets, creating an uneven and course, crumbly texture. This is distinguished from a cake mixture (or “cake masquerading as a muffin—better known as a cupcakeâ€), where air is creamed into the batter and creates even air pockets throughout and a more tender texture. Very different! Alton Brown says “Yes, Virginia, pancakes are muffins—flat, griddle-cooked muffins.â€
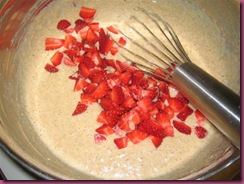
Heat your pan or griddle to 350 degrees while you put everything together with The Muffin Method and let the batter rest for 5 minutes. I added the strawberries after the batter set. You can tell if the pan is hot enough if a sprinkle of water dances across the surface! A little bit of butter or a spray of cooking spray preps the pan and then you’re ready to ladle the pancakes out!
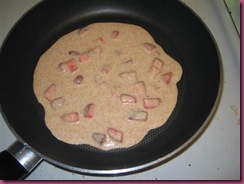
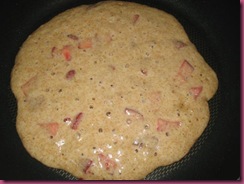
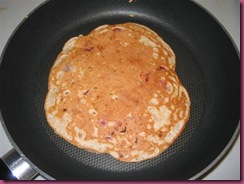
I think because of the strawberries, my pancakes refused to form a circle! So frustrating! So we had oddly-shaped breakfast. I’m really fine with that. If you compare the two pictures of the batter in the pan, you can see how much the batter puffs up while the first side cooks…that’s the muffin method at work!
When I make pancakes, the first one is always a dud that we use to test the flavor…does it need more sweet? Maybe some cinnamon? What kind of toppings should we get ready for them? And we pick at this first one as we cook the rest. You can tell the pancakes are ready to flip when bubbles break on the surface and you can see the edges drying out a bit. Use a spatula to peek under and if the pancake is brown enough, flip as carefully as possible! I usually make small pancakes so there is less risk of pancakes breaking in half during this flipping process. I tend to make a mess either way, so I went with huge pancakes this time.
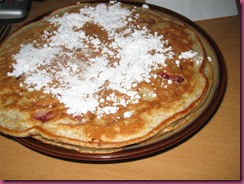
We topped them with powdered sugar and froze a few extras to heat up in the toaster oven for breakfast later this week!
(these are our tiny plates, not our full-sized dinner plates…they weren’t THAT huge!)
Because we had a really late breakfast/early lunch, we were feeling snacky in the middle of the afternoon and splurged on some nachos, leaving us full until pretty late in the evening. I usually don’t like to eat a late dinner because I get grumpier and grumpier as I get tired and hungry, so cooking is not a great option as the evening wears on.
Our super-late dinner was a Thai Fried Rice recipe I found online. I’m not going to link to it because it was SUPER spicy. As I tweak it, I’ll try to post a better fried rice variation. Normally I just wing it with a blend of veggies, an egg, a little hoisin, chicken broth, and soy. Usually we have some leftover meat from earlier in the week that I throw in, or we make pot stickers for the side. I do the same variation with noodles every once in a while to make a lo mein type dish that is really really satisfying.
I was craving Thai Fried Rice, though. Our weekly Thai Tuesday location has been out of commission for quite a while because they’re remodeling the entire thing. This has led to lots of yummy International Tuesday adventures, but I like the reliability of our regular place. So I found this recipe and just went with it…I had less rice than the recipe called for, but a lot more veggies, so I figured it would even out.
I don’t have any pictures of this, because I was completely blown away by the spicy level. On a 1 to 5 star scale, this was at least a 7. As I was dishing it up, I got a little sauce on my finger and licked it off…I needed a glass of water just to cool down from that little bit! I managed to eat almost a whole bowl, and Matt liked it quite a bit. I tried it as leftovers with lunch today and put it over a green salad with a light ranch dressing…it helped a bit, but still SO spicy. My standard throw-everything-in-the-wok-without-a-recipe method is still my favorite, but as I play with Thai recipes, maybe another one will come out on top and I’ll provide some details if that ever happens!


